Hello and Welcome,
Springtime has finally come to Michigan. I have finished the Schwinn Traveler step-through. It was originally set up as a tourer with drop-bars and a coil sprung Saddle. It also had chrome steel fenders (somewhat dented up) typical of an old Schwinn I guess.
Below: The Traveler stripped down to the frame.
Left Click on Image(s) to Enlarge. Left Click Back(<)Button to Return
Below: As usual I used Mother`s to get the last of the grease out of the bearing cups and races. This of course includes the races for the crank bearings. The crank bearings and cups were cleaned with White-Lightning Clean-Streak. I recommend you use the White-Lightning out doors. And keep your work area well ventilated when working with all the different polishes and cleaners. Your lungs will thank you latter.
Below: The Crank and Bearings all cleaned-up and ready for reassembly. Notice the bottle of "Turtle Wax Chrome-Cleaner/Rust-Remover" It turns out, The Turtle-Wax works better than the Mother`s on the badly rusted chrome. But on the "good chrome" Mother`s is the best I`ve ever used. So I guess there is room in my shop for both.
Also notice the "one size fits all" plastic medical gloves. These are great when working with chemicals. I buy them at my local drug-store. Money well spent.
Below: A shot of the one piece crank assembly back on the bike. Next up, The Head-Set & Fork.
Below: After wiping the grease off the fork crown race. I smear some Mother`s Mag and Aluminum Polish on the race. Let it sit for a minute or two, the grease remnants should wipe-off with a clean rag. If it is really bad, you may have to repeat and possibly touch-up with a brass detail brush. I talk about this a lot, but I think this is the first time I have actually photographed it.
Below: This head-set has loose or free-floating bearings. I like to grease these cups heavily. This allows me to stick the bearings in place. Once I have the top bearings in place. I then carefully loosen the clamp (on the work stand) and gently rotate the frame just enough to access the bottom cup.Then re-tighten the clamp of course.
Below: The Head-Set reassembled and ready for the Stem and Handlebars. It is always a good idea to keep track of the order in which things are stacked on the head-set. A sketch or digital photograph will do the trick nicely. The thread on cap/race is always first. Usually next is a washer/spacer with a nub that fits into the slot on the steer`r tube. After that is usually the cable guide bracket (if center -pull brakes are used) Or the reflector mount bracket. Or as in this case, the head mounted shift levers. Then the cap-nut. But they are not all the same. So make a sketch! (picture)

Below: The Stem and handlebars all cleaned up (stem with Mothers) (bars with chrome polish) and ready to be installed. I like to lightly grease the stem below the max line before inserting it into the steer`r. Also lightly grease any threads during assembly (especially the free-wheel threads on the rear hub). I don`t really prefer this type of stem with the expanding plug thing. I prefer the common wedge type. This type can be a bugger to take apart down the road.
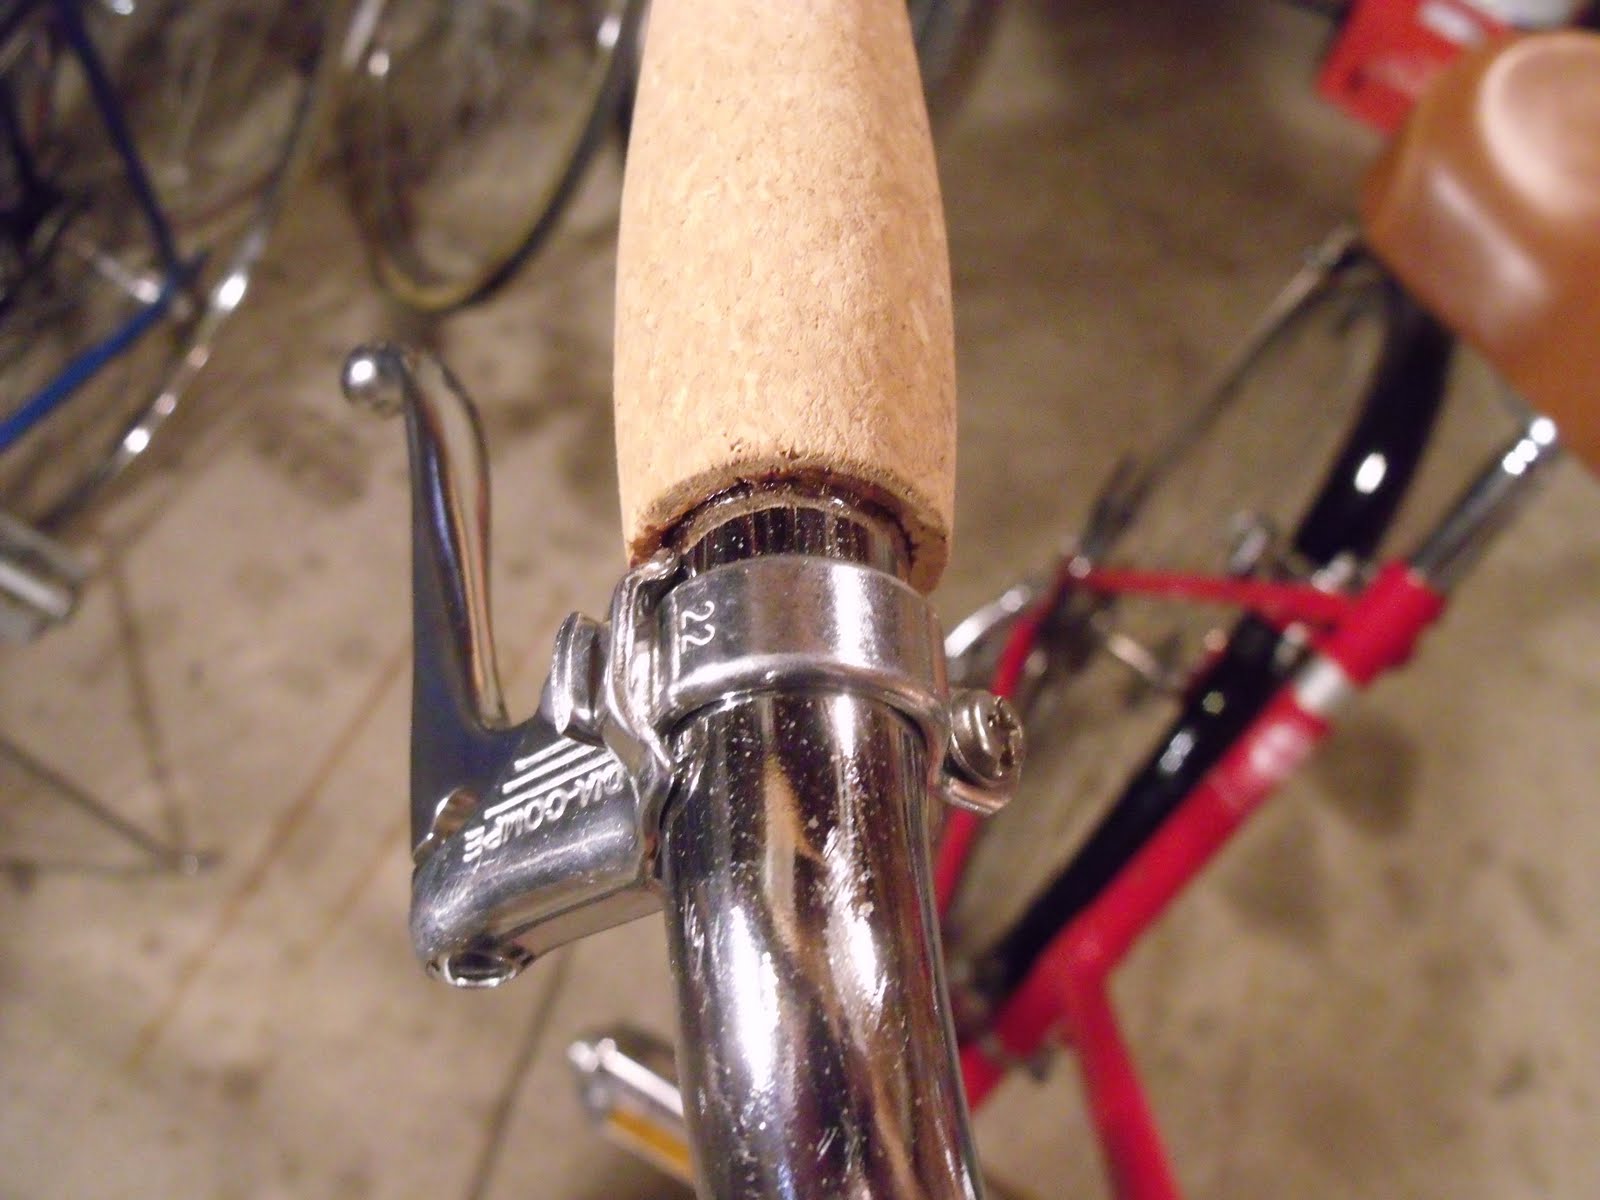
Below: Ok, Now that Stem and Handlebars are mounted, I slide the Dia-Compe brake-levers into place. I have slid them on as far as they will go. I then slip on the cork grips and measure the distance between the lever mount and the grip. Why am I doing this? These bars are really wide and I want to shorten them up a little. It looks like I can safely cut-off 3/4 of an inch.
Below: I have made a mark at 3/4 of an inch in from the bar end with a Sharpie. Then I use the tube-cutter to cut-off the excess. If you have never used a tube/pipe cutter, it is simple. Just open it up, slip it on lining up the roller blade with your mark. Snug it up. Now as you rotate the cutter around the tube, tighten the cutter (like a C Clamp) gradually as you go. And before you know it you will have cut it off. Sweet!
Below: After test fitting the grip and being sure it is all "good to go". Now I smear a little bit of Permatex #1 (form a gasket) inside the grip and slide it into place. I use the # 1 Permatex because it does harden. You don`t want the grips moving around or pulling off. Your going to want to use a glove for this.. trust me.
Below: This is what I have chose to protect the grips. You can find Shellac at any Paint Store or Builders Supply or Hardware Store. I will also be using it to re-do the wood trim on my truck (lorry) tail-gate. And maybe on some wood fenders.
Below: Here is the grip finished. I used a cheap brush and a piece of card board to catch the drips. Sorry for the crappy pic. My photographer (son) was not around to snap the shot. But you get the general idea.
Below: Next the wheels. A little trick I like to use. First I do one little section of the worst (rusty) part of the rim. If I can make that acceptable I know the rim is worth saving. This one required some more brass brushing and polish. But eventually it cleaned up pretty good.
Below: Front hub and wheel after much brass brushing and polishing. On the rim I used Turtle-Wax Chrome-Polish/Rust remover. Like I said "On the rusty stuff" I gotta give the edge to "The Turtle". On the Hub I used Mother`s Mag and Aluminum Polish. And lots of brass brushing on both.
Well my friends, It looks like there is going to be a part two. If I don`t stop now my head will explode. (: I`ll try to finish up this one up before the new week begins. Till Next Time, RIDE SAFE and Remember to Always RESCUE, RESTORE & RECYCLE
Cheers,Hugh


Hey S-R and R
ReplyDeleteI would recommend high quality puncture resistant tires.I would look for tires with a Kevlar layer. And you definitely want to make sure it has been completely serviced. Sorry no links can be posted with you comment.
i have a shwinn travel, all original, just curious how much it is worth.
ReplyDeleteHey Anonymous,
ReplyDeleteWithout seeing the bike or knowing the year of manufacture and it`s "service history"(or lack there of). I have no idea.
But "If" you are thinking that original 25 to 30 year old tires, cables, brake-shoes, grease etc. etc. Increase the value of the bike, You are mistaken.
I typically pay 20 to 30 dollars for bikes fresh out of long-term (20-30 yrs.) storage.
Thanks for the inspiration. I have been thinking for quite a while about doing a post on this very topic. "All Original" and what that "really" means.
Cheers