Sunday, July 15, 2012

"Updated" Nishiki Mountain Bike / Brake Repair & Tune-Up

Hello and Welcome. A few weeks ago one of my coffee shop friends "Don" asked me if I could tune up a lady friends bicycle. (his lady friend not mine) lol.. I am after all a happily married man! He also mentioned that there was a problem with the brakes and that he would like me to take care of that as well. I gave him the tune-up price (plus parts) and we agreed I would tune and repair the bike.
Note: The above pic is the bike finished and going back to the owner. Above: A few days later I picked up the bike at the coffee shop. I was relieved to see it was not a Department Store Bike but a Nishiki Blazer mountain bike. I could see right away why it needed a tune-up. Every thing was filthy and or coated in mud. It has been my experience that "the most common problem with derailleurs" Is Neglect. Most just need a good cleaning and lube and some slack taken out of the cable. Countless times I have tried to tell folks that a little light maintenance can go a long way. I get the feeling that most people think that if they purchase a good quality bike they will not have any problems. Even a good quality bike needs a little maintenance from time to time.
CAUTION:You would Not normally want to wash a bike with a power-washer. And would never point it at any hub or bracket shell (from the side) or headset from the top or bottom. This could easilly blow-out the grease and also get the bearings and inner surfaces wet causing rust or corrosion. This was an "absolute first" for me. This is the the front derailleur after Power Washing at the quarter car-wash. Now it is ready for a "normal cleaning" and lube.(White Lightning Clean Streak and Tri Flo) This lady lives on a dirt road that is regularly coated with chloride for "dust control". When a chloride treated road gets wet it makes a mud that sticks like crazy. A mud that will also discolor chrome if not removed promptly. So once the mud was washed away I gave it the normal spray (White-Lightning) and brushing(Park brush and scraper set) Then a spray with the Tri Flo. After that I took a little slack out of the cable. And guess what? The derailleur now works flawlessly. So the message here is.. Do not be so quick to replace your malfunctioning derailleur, chances are it is just dirty.
Above: Here is the Shimano Altus rear derailleur after blowing the hardened mud off at the quarter car wash.(only the derailleurs were power washed) Now the rear derailleur and free wheel and chain just needed a little basic maintenance. For cleaning the Free wheel I used White-Lightning "Clean Streak" and the Park scraper and brush. Then a light spray with the Tri Flo.
Above: Here I am using my chain cleaner with Park Citrus Chain Cleaner. After the first cleaning, I rinsed out the cleaner and refilled it and cleaned the chain again. Sometimes that is what it takes. I wiped it down with a rag between cleanings to help the process. After drying I gave the chain a light coat of bicycle chain lube and wiped off the excess. There is an old saying "If your chain looks oily, it has too much oil on it". Dirt sticks to oil! You do not lubricate a dirty chain. You Clean Then Lubricate a dirty chain. Once the chain, rear derailleur and free wheel were clean and lubed. I again removed the slack from the cable (as I did on the front derailleur) then the rear shifted flawlessly as well. The brakes were not so easy.
Above: Here is a diagram of a very similar MTB cantilever brake. I have labeled the spring cover (A) and the return (torsion type) spring (B). When the brake is assembled it is the spring cover (A) that holds the return spring (B) in the proper position. The return spring has a prong at each end. One prong end is inserted into a hole on a little flange (that on this bike is welded) to the brake post mount that is brazed onto the seat stay. The outer prong is inserted into a hole in the top inside of the spring cover.
Above: Three of the four return spring covers removed from the Nishiki bicycle. As you can see these three are broken and will not hold the return springs in the proper proposition. This causes the springs to unload or loose tension on the arms. The result is brakes that do not return to the proper position when the brake lever is released. This results in brakes that rub the rim and do not apply good pressure when applied. I suspect the owner tried to adjust the rub out of these brakes making them pretty much useless. Now my problem is, Where do I find these little plastic spring covers off a 25 year old bike? Answer... I don`t.
Above: (C) Return spring (D) Single edge razor blade (E) The piece I cut off a larger salvaged spring cover to make it fit. What I did was search through my tub of small brake parts and found three slightly taller spring covers of the same diameter. I was not sure if this would work, but I had a good feeling it might. One good thing about the replacement covers is they were made out of a more pliable (flexible) material. I stood the two covers side by side to check size. This showed me I needed to shorten up the replacements proximately 1/8 inch. That is what I used the razor for.
Above: Here is a close-up picture of one of my replacement spring covers in place on the reassembled brake. I do not have much experience with taking apart broken cantilever brakes. I think the "Bicycle Gods" were watching over me while I was attempting this repair. What is harder than the actual repair? Trying to explain how I did it so it makes sense. Hopefully the pictures will help with my description of the work. Good News! Don has since reported back to me that The lady is very happy with her bike. She told Don "It had not ridden that well in years".
Above: OOPS! I forgot to include this. I replaced the front left cantilever arm. (the one with the anchor point) The original was damaged, it was easier to replace it than to attempt repairing it. My replacement is the same size and basically the same design. However it was painted black. So I sanded off most of the black finish and now it does not look out of place. And it works great!
Above: Getting back to the dirt roads sprayed with chloride for "dust control" for a moment. Above you can see where this mud ate right through the paint. The message here is "If you ride on a dirt road that is sprayed with chloride for Dust-Control, Then you better be practicing good Rust Control!"
Above: In other news, I have made a few changes to the classic style fixed gear bike. I have installed a new brown Charge spoon saddle and some very comfortable and stylish ergo grips. I think I am going to remove the brake to give it a cleaner look.
Above: Coming soon "Raleigh Teton Mountain Touring" restoration. And a 15 to 18 speed conversion. Easier and cheaper than you might think. Until next time Please RIDE SAFE and Remember to Always... RESCUE, RESTORE & RECYCLE Cheers, Hugh
ATTENTION AMAZON SHOPPERS!! You can help Support This Blog by simply logging onto Amazon dot com using the Amazon Search Box located at the Top Right Corner of This Page. It will not effect your cost and I will receive a small commission. Thanks for your support, Hugh

Saturday, July 14, 2012

Rusty Raleigh Sprite Restoration Part 3

Hello and Welcome, It has been a while since I updated the blog, for this I apologize. The weather has been insufferable and has really been "wearing me down". I have been getting up early and working before it gets too hot to do anything. By the time I get the tools put away, (usually around 1 or 2 pm) I am soaked in sweat and exhausted. I find it impossible to write when I am completely drained. Today I quit early and turned on the a.c. So I am feeling pretty good today. Below is a picture of the Rusty Raleigh where I left off on my last post.
Above: I convinced myself that the front fender would not be a problem because it looks pretty much the same as it did when the bike arrived. lol Yeah right. We will get back to that in a little while.
Above: I was sure I had a set of English 26 tpi thread quill pedals. It turns out I used them on another project. So I decided to try to salvage the original pedals. They came out much better than I expected. And considering this is an old style Raleigh upright touring bicycle, I think it would look better to have the correct block pedals. Besides they have that really cool Raleigh logo molded into the blocks.
Above: I think these block pedals look really good on an old English 3 speed bike. This is definitely not a 3 speed, but is in that same classic English style. The restoration is coming together nicely, especially considering all the time this bike has spent out in the weather.
The new Kenda gum wall tires look fantastic. The rear tire cleared the fender with out a problem. The front tire rubbed the lower back inside of the fender or mud-guard badly. (no real surprise there) My first idea was to change the struts. I do have some salvaged struts I have been saving for just such an occasion. Unfortunately none of them were any longer than the original struts. My next thought was to fashion some sort of a "strut extension".
Above: Digging through my miscellaneous small parts I found these L shaped brackets. First I flattened them out on the anvil part of my shop vise using my Ball Pein Hammer. Now I have a flat piece of metal with an elongated hole at one end. Holding the piece up to the strut mount it looked like I just needed the end with the elongated hole "on the now flat bracket" to extend the strut. So I cut it off using a hacksaw and fortunately it worked perfectly.
Above: Just like the pedals, I had no plans of restoring the original touring brake levers. I had decided that I would use the brake levers off my unrestored 1964 Raleigh Sports 3 speed. As luck would have it, I was not able to locate one of the levers. So I had to try to reuse the original brake levers. First I cleaned up the outer body and lever handle using the fine brass wheel brush on the 18 volt rechargeable drill. This actually worked out real well.
Above: To clean out the inside of the body or frame I dug out the spider sacks using a very small slotted screw driver. Then cleaned it up using a Q tip with a little Turtle Wax Chrome Polish and Rust Remover on the tip.
Above: The constrictor clamps on the brake levers were badly rusted. I tried to remove the rust using the brass wheel brush with very little success. First I should mention that I wanted to replace the clamps with clamps from salvaged levers. But I had none that were big enough. This is another first. I used the small angle grinder to remove the rust. Carefully using the underside of the grinding wheel. It actually worked pretty good. Desperate times call for desperate measures!
Above: As for grips, I planned on using these Dimension cork grips with a good coat of shellack. The touring handlebars were just too fat for the cork grips. The grip split as I carefully tried to make it fit. I will try to glue the crack and use the cork grips on another project. So for a temporary solution I borrowed a set of white grips off another bike. I have since replaced them with black grips that are not original. But they are the same "smaller size" and are much more comfortable than the originals. So it is a change I can live with.
Above: This wonderful "period correct" bicycle tool bag came in on a Schwinn World. After a good cleaning inside and out and some "Bear Grease" on the leather, it looks fantastic. I hope Brian leaves it on there, because it really does look good and correct on this style bike.
Above: The Raleigh decals that were generously donated for this project by Darrell Yarborough from "Bent Wrench Restorations" in Arlington Hts. IL look great. Thanks Darrell. I did not get them perfectly straight, but I think I did ok. Unlike wet decals, You really need to get these right the first time. So my advice is, Put these on before you drink your morning coffee :)
Above: As usual I used Jag Wire X Caliper brake shoes, cables and cable housings. A good tip to remember: When you cut the housings for the stem mount shift cables make sure you cut them both the exact same size. And cut them just long enough for the cable to move smoothly through the housing. I have seen them cut (1) way too long or (2) way too short or (3) cut different lengths altogether. None of those three will look professional. And as always put a drop or two (depending on housing length) of clean cable oil in each housing before you insert the cable.

Above: Another first for me. The gold detail around the lugs and on the fender tips. I used Testors gold enamel purchased from Tower Hobbies online. I also purchased a set of camel hair paint brushes from Tower. This is another project you might want to try Before you drink a lot of coffee! Because the original fenders on this model year are kind of plain Brian (the owner) and myself decided to "dress up" the fenders a bit with a little gold detail.
Above: A shot of the front fender tip gold detail. I do have a little touch up to do, but overall I am pleased with how the gold enamel came out.
Above: My favorite Raleigh decal and the rear fender tip detail.
Above: The Raleigh as is it looks right now. (seriously I just took this pic moments ago) Do not stress out over the saddle, it is temporary. No worries! Brian has ordered a Brooks saddle for the faithful steed.

Above: Just a reminder of where we started. It has been one amazing ride!

UPDATE: The formerly Rusty Raleigh Sprite shown with Brian's Brooks Saddle. Excellent Choice, Well Done Brian!
Until next time, RIDE SAFE and remember to always RESCUE, RESTORE & RECYCLE
Cheers,Hugh
ATTENTION AMAZON SHOPPERS!! You can help Support This Blog by simply logging onto Amazon dot com using the Amazon Search Box located at the Top Right Corner of This Page. It will not effect your cost and I will receive a small commission. Thanks for your support, Hugh

Tuesday, June 19, 2012

Rusty Raleigh Sprite Restoration Part 2

Hello and welcome, As for where we left off on the rusty Raleigh Sprite restoration, let's see... I had pretty much finished sanding down the lugged frame for primer at the end of the last post.

Also I had found a replacement for the rust damaged fork. As for the bicycle fenders "and the replacement fork" they were sanded down primed and painted. And I located (in the shop/garage) replacement wheels, side pull brake calipers and derailleurs, all in need of refurbishing. But none the less all a huge improvement over what the bike showed up with. First step, touch up the frame and get it primed for paint.

Above: Once I was sure that I had sanded the frame and removed all the original paint and primer. It is now time to clean the frame and get it ready for primer. I use the mineral spirits (above) on a clean rag or paper towel to carefully clean the frame. Next I need to tape-off anything I do not want primed and painted.

Above: I will use this "Scotch Blue Painters Tape" to tape-off or cover anything I do not want painted. I will use the razor or x acto knife to cut the tape exactly where I want it. It is important to use a good quality tape. You do not want to use a cheap masking tape. Painters tape will work much better "in every way". Meaning it will leave cleaner lines where the tape ends and the new paint starts. Also it will remove easily, not leaving adhesive behind like cheap masking tape will often do. So you will definitely want to use a decent painters tape to mask or tape off your project.

Above: I have tried to show you how I cut along the edge of the head badge by marking this with a dotted line. This is where the "Hobby knife" or X-Acto Knife is a must. This badge is riveted with solid brass rivets. I have more confidence in my taping and cutting skills than I do in my badge rivet removal skills. So "for this time anyway" I will attempt to tape-off the head badge.

Above: Here I have taped-off the bottom bracket shell. I do not want any more paint on the threads. I also taped-off the head set cups. I do not yet own a proper headset cup removal tool. I also taped off the threaded studs on the rear drop outs. (rear fender mount)Now I am ready for primer.

Above: I chose to go with a black sand able primer. The finish paint will be a glossy black Rust Oleum enamel. So with the black primer hopefully any future stone chips will be less visible. You do not want to mix enamel and lacquer so read the paint and primer cans very carefully. If you have any doubts ask questions. Pay particular attention to the humidity information on the can. I only use one brand of paint and that is Rust-Oleum. So I really can not comment on other brands. Two things you want to remember when painting or priming are Always fog coat the paint. In other words do not try to get all the paint on at once. And second Never start or stop spraying directly over the object you are painting. And keep the can moving when spraying. and shake the can well and often. (I`m pretty sure that was more than two things..lol) All the info about preventing and dealing with clogs is printed on the cans, So read it.

Above: If your inexperienced I would recommend you prime and paint the road bike fork first. This way, if you screw it up it is much easier to re prep the fork than to re prep the frame. And be patient. More paint jobs have been ruined by rushing the job than anything else. At least that was my experience as a youth. The re-spray or second coat times will also be listed on the cans. If you are going to open-air paint check the conditions carefully. You do not want to open air paint when the cotton wood seeds are blowing around or the air is filled with insects, ash or blowing leaves. If your in a bad location you may want to build a D.I.Y. paint booth. (See You-tube)

Above: Right after I finished the second coat of paint the cotton wood seeds started blowing around. So I picked-up the Park PCS 9 work stand and all and moved it into the shop to cure for a while. Once it was "dry to the touch" I placed it back outside in the sun to dry some more. I give the paint 72 hours min. to dry before re-assembly. The touring fenders and fork because they were painted first, got much more "curing time" than that.

Above: Here I have begun re assembly. I have tilted the frame to make it easier to keep the free drive-side crank bearings in place while installing the bottom bracket axle. By no means has this paint hardened all the way. So I am extra careful during re assembly not to nick the paint.

Above: Here is the 10 speed double road crankset re assembled and installed with new cotter pins, minus the badly rusted chain ring guard. Above: New mounting screws and washers (and sanding the fender struts) gives the fender a real fresh look when finished. We (the owner and myself) have decided not to paint the rear fender tip white.

Above: A shot of the front fender mounted. I am very pleased with the way the replacement wheels cleaned -up. Particularly the way the hub flanges match. Although (because of the pie plate) this can only be seen from the left side.

Above: I ran into an unexpected problem with the salvaged replacement brake calipers. They were not quite wide enough to reach around the fenders. So I took the originals apart and polished the arms. Then I used the hardware (post, springs, barrel adjusters etc.) from some salvaged calipers to build new calipers (well sort of) This is cool because now the brakes look original. And for the most part they are. Above: The re manufactured rear brake caliper looking pretty spiffy if I may say so myself. The only thing I did notice doing this is... The nut behind the acorn nut on the post is wider (thicker) than the original. This makes it so that the acorn nut does nut thread on all the way. I will take the rusty (thinner) original nuts to Peter's hardware for matching replacements. Other than that there was no problem re manufacturing the calipers with the borrowed parts.

Above: The bike is coming along nicely. I have new Kenda gum walls and grips on order which should arrive by early next week. I am working on getting a set of English thread touring pedals. Hopefully I can locate a set that won`t break the bank. If you know of a reasonably priced set on e bay or elsewhere please forward the add.

Above: The rusty Raleigh has come a long way. And it has been a real learning experience for me, That's for sure! I hope to get it wrapped up on the next post. Sorry for the delay. I have been feeling a little "under the weather" Today is the first day I have felt really good in a week or so. So hopefully I`m through with that nonsense for a while. Until next time RIDE SAFE and Remember to always RESCUE, RESTORE & RECYCLE Cheers, Hugh

Tuesday, May 29, 2012

Rusty Raleigh Sprite Restoration Part 1

Hello and Welcome,
I am restoring this 10 speed Nottingham Raleigh Sprite for Brian. Brian is the fellow who purchased my GIANT Attraction mountain bike earlier this spring. This Raleigh was apparently left outside for an extended period of time. It was badly rusted to the point where I had serious doubts about whether or not it was worth restoring. The first thing I did was take it apart and make sure the bottom bracket and headset were serviceable. As it turns out they are both savable I may need to replace the bracket spindle or axle. And it will no longer have a chain ring guard (or at least the same chain ring guard) And I may need to replace all the bearings. But all this is manageable, I guess.
Above: Here is the Sprite looking as if it doubled as a boat anchor for a couple summers. Mt first instinct was to pass simply because it needed so much replaced. But I decided to see how much I could replace using salvaged components that I already have in the shop. As it turned out I have both wheels. The rear is a perfect match to the rear wheel that is on there now (minus the rust). And I have a front wheel that I think will actually look better than the one that is on it now. Mine has a higher flanged hub that looks more retro. I also have both derailleurs, well sort of.
Above: The company that manufactured the rear derailleur for Raleigh manufactured virtually the same derailleur for Schwinn. And all things considered, I think it will do fine.
Above: My good fortune continued "or even improved" with the front derailleur. It turns out I have what appears to be the exact same Huret front derailleur in my collection of salvaged and take-off front derailleurs. This is important because, the amount of replacement parts needed "if purchased" would make this restoration way to expensive to attempt. Now for the brakes. So much of the brake caliper's hardware (springs, barrel adjusters, mounting bolts and nuts etc.etc.) has deep rust that they are not worth trying to save.
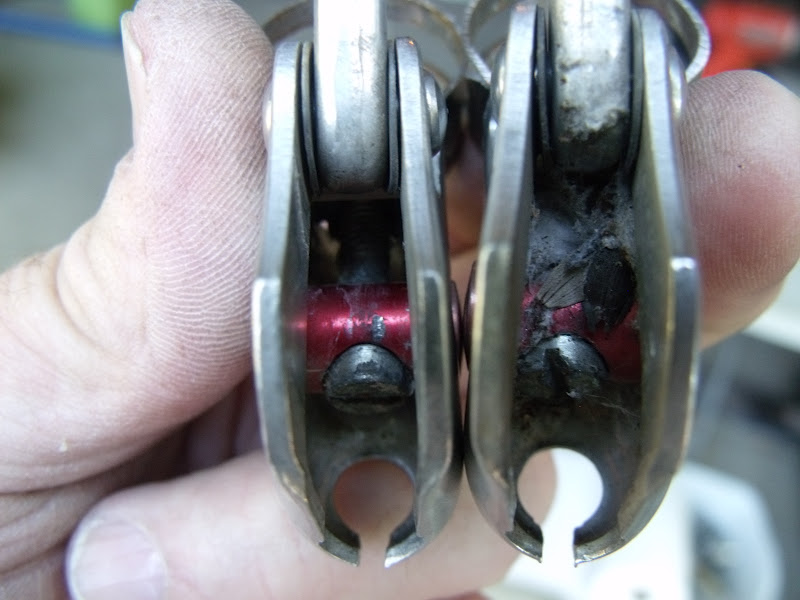
Above: At first glance, my side pull brake calipers do not look much better. But trust me on this one, these will clean-up nicely. And although mine are Dia-Compe and the originals are Weinmann they are of equal quality. And "design wise" they are a real good match.
Above: I did not run into any surprises until I got a closer look at the lower inside blades on the original fork. This rust is too deep and in a really bad spot. There is no way I can use this touring road fork. I knew this was going a little too well!
Above: This is really incredible! While the drop-outs are on a slightly different angle. Laying side by side the rake on the two forks is nearly identical. And this is Really Cool, The steerer tubes from the crown to the top of the tube are exactly the same length and size. I quickly tried it for fit and realized the crown races would need to be switched. So the very next day (at Cycle Therapy in Waterford Mi) I had the crown race removed and replaced with the crown race from the Raleigh fork. Then rushed home to mock it up and see if it would work.
Above: And it did work! The Bicycle Gods are shining down on me again! The original stem could not be removed! After lots of penetrating oil and tapping and twisting, I gave up and cut the S.O.B. off. I replaced it with this very "Vintage English" looking stem which I found in my tub of salvaged stems. This is why I try to never throw anything away that I think I may need at some point down the road.
Above: I really do not want to purchase new fenders. I have to repaint the frame and fork and the money is just not there. While the fenders are rusty, and the once Bronze metallic paint now appears to be a light brown. They are not dented and the struts are not all mangled. So I will try to save the touring bicycle fenders before I continue on with the frame. Lots of sanding ahead! and some wheel brushing as well.
Above: Here is the front fender after sanding and priming drying outside in the sun. Not too shabby! Looks like all I will need to replace on the fenders is the bicycle fender mounting hardware.
Above: After the Rust-Oleum Gloss Black Paint was good and dry (about 48 hours) I hung the fenders up high and out of the way so nothing bad will happen to them before I need them.
Above: A shot of the fork sanded and ready for primer. I used the fine brass wheel brush on the high speed drill to remove the paint from the area around the lug work at the top of the fork blades. You will need to wear safety glasses or goggles for that job. And a respirator (mask) if dry sanding.
Above: I like to use 220 grit (automotive) wet sanding paper followed by 400 grit and then 600 grit. This will give me a nice smooth surface for primer and paint.
Above: The fork primed and ready for paint. This is the third bike and second primer and re-paint for this fork. This is the same fork I used on the "Stars and Stripes" fixed gear bike. Which I later cannibalized for the red lugged frame fixed gear bike.
Above: The fork drying outside in the sun. The white areas you see on the fork are glare, not missed-paint spots. And no I did not paint the fork next to my wife's car.
Above: Here is a shot of the bottom bracket shell cleaned out. I coated the threads with grease to protect them from moisture / corrosion. The drive side would not budge. Not wanting to do any damage with my adjustable wrench I decided to leave it alone and clean it up in place. They do not give you much to lock onto on the right or drive side cup for removal.
Above: I did not have a bicycle seat post that fit the seat-tube. So I used the fine brass wheel-brush and some Turtle Wax Chrome Polish / Rust Remover to clean-up the original. For some unknown reason the size is not engraved or stamped on the original post.
Above: Here I am wet sanding the frame. I keep a rag handy as the wet sanding will smear the paint. So I need to wipe it off often to see how I am doing.
Above: Here I am rinsing paint off a piece of 220 wet sand paper so I can get the maximum use out of it. I probably used about 8 full sheets of 220 grit on this frame. I use much much less of the finer paper to smooth the finish. The great thing about wet sanding is it really keeps the dust down.
Above: To remove the paint around the head badge I use a single edge razor blade. Them finished it with a very small folded piece of sand paper. I plan to tape over the badge trimming around the perimeter with an X Acto knife before spraying primer and paint.
Above: Here is the frame "pretty much ready" for primer. I will probably do a little more touch-up before I put the primer coat on it. I will also wipe it down first "very carefully" to remove all the dust before spraying.
Above: I do not recommend you remove the cotter crank pins in this manner, especially if you are not experienced. I use penetrating oil, a lug nut and a large heavy duty C Clamp and a small propane torch. I have learned to give it a little time, it usually pops the pin loose when I least expect it. When the pin breaks loose the clamp and nut and pin all fall on the floor. So I am careful not to leave anything breakable underneath.
Above : Early on I put my wheels on to check for fit. The rear wheel was originally going to be my replacement rear wheel for the Parliament. But it has a little pitting. So I refurbished the original wheel after I found-out that Joe at American Cycle and Fitness in Pontiac had the correct (1969)free wheel removal tool. But even with a little pitting, this wheel is a hundred times nicer than I could ever make the original. So that's about where I am at with the Raleigh Sprite. Tomorrow I prime and paint the lugged frame. Then I will get busy with the crank and headset.
Above: I added a rack bag to the single speed/fixed gear "touring style" commuter bike. Now I can bring along my camera every time I ride. I have already missed a couple of really good photo ops this spring. Eventually I will add cheap panniers to the rear bicycle rack for running errands. Can you spot what is not quite correct on this bike? I should have much more progress to post on the blog next week. So Until Then Please RIDE SAFE and Remember to Always....RESCUE, RESTORE & RECYCLE! Cheers, Hugh
 
Cycling Blog Directory